Android Root Detection Bypass via Code-Tempering and Prevention

In this post, we will show you the basic steps of the root detection bypass method along with prevention implementation.
Why is a rooted device potentially dangerous. ?
On the root, device data is at risk, including gaining access to personal information such as contacts, emails, and other sensitive data. With a rooted device, a user or malicious program can elevate their permissions to root and circumvent this protection giving them access to other app’s private data.
How to find root detection logic in any application. ?
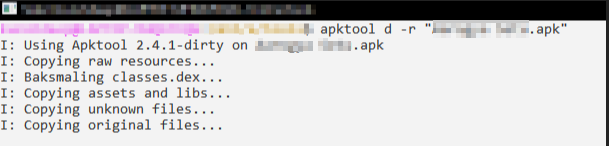
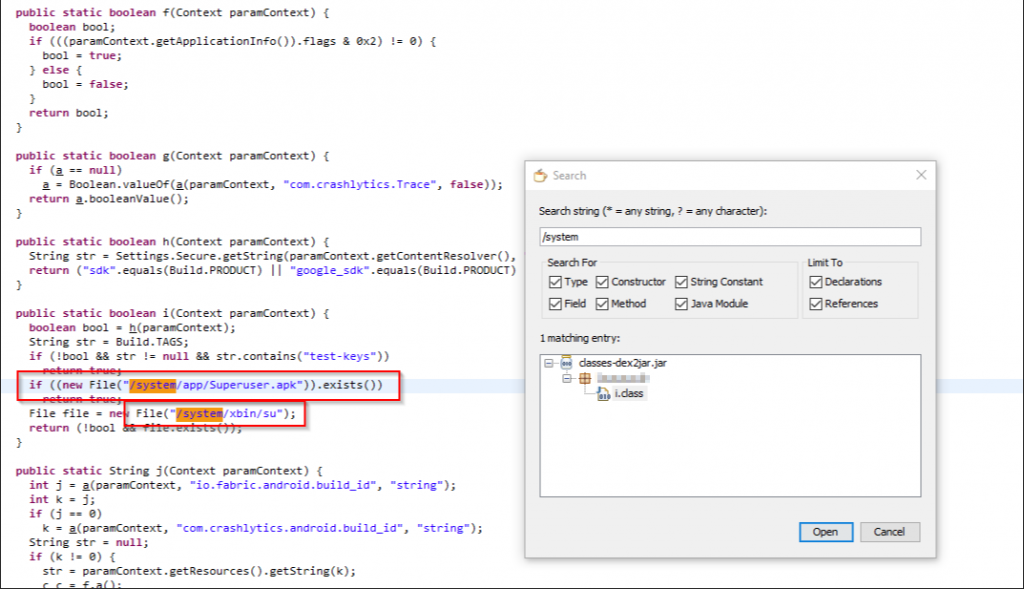
After decompiling the “.apk” file. You can search the specific words like(/system, su, superuser, etc.) in the whole package with the help of JD-jui, android studio, or other java/kotlin binary readers. As you can see in the below images.
Modify the root detection code logic. !
Once you found the logic of root detection in code. Then change the logic or the values by simply edit the “.smali” file, as shown in the below images.
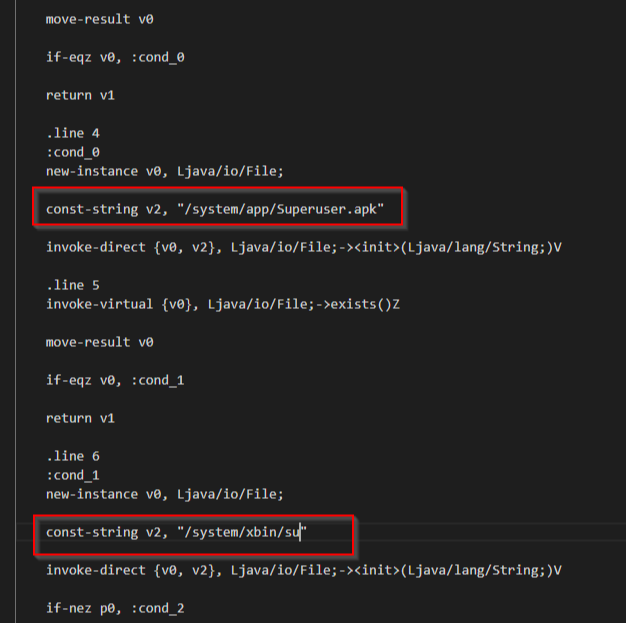
> Original file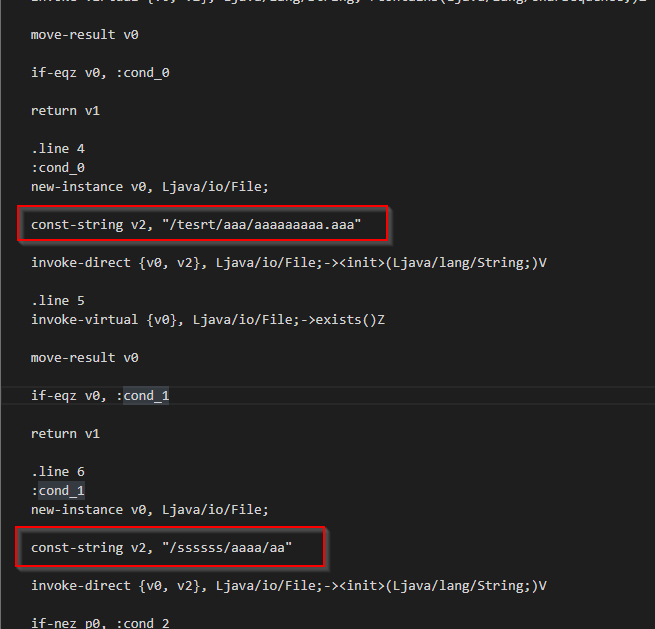
> Modified fileRebuild and Signing the application with certificate. !
After changing the logic you need to rebuild the application along with signing the application with certificate to make a trusted signed application for android. As shown below.

> Rebuild the apk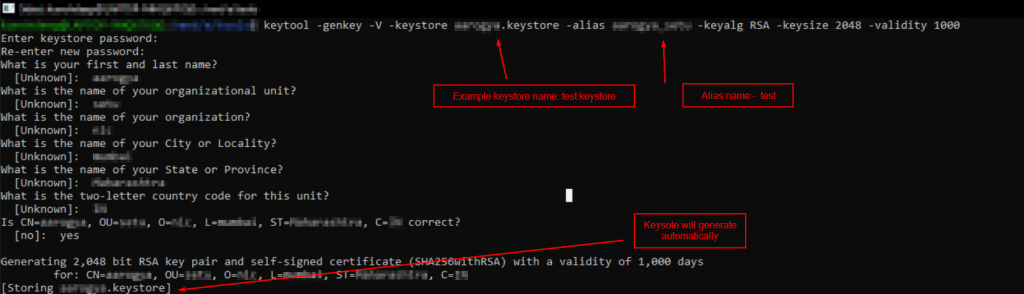
> Generating the keystore file for signature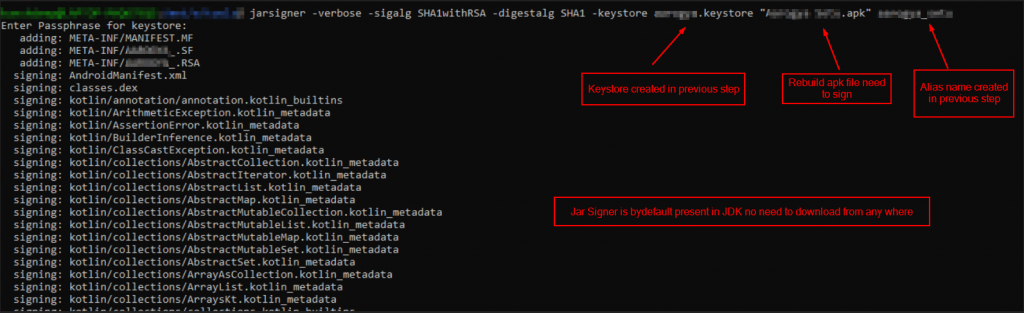
> Signing the modified apk with generated keystore fileAfter completing the above steps, the application is ready to install in rooted devices. This method works only if the code tampering detection mechanism not implemented.
Prevention mechanism:-
The developer should have implemented the code tampering detection mechanism at the runtime level.
Below is the example code for app signature verification. Which will check the signature at runtime.
import android.content.Context;
import android.content.pm.PackageInfo;
import android.content.pm.PackageManager;
import android.content.pm.PackageManager.NameNotFoundException;
import android.content.pm.Signature;

public class CodetamperCheck {

// store the hash of the signature for a little more protection

private static final String APP_SIGNATURE = "1038C0E34658923C4192E61B16875";

  /**
	 * Query the signature for this application to detect whether it matches the
	 * signature of the real developer. If it doesn't the app must have been
	 * resigned, which indicates it may been tampered with.
	 *
	 * @param context
	 * @return true if the app's signature matches the expected signature.
	 * @throws NameNotFoundException
	 */
	public boolean validateAppSignature(Context context) throws NameNotFoundException {

		PackageInfo packageInfo = context.getPackageManager().getPackageInfo(
				getPackageName(), PackageManager.GET_SIGNATURES);
    //note sample just checks the first signature
		for (Signature signature : packageInfo.signatures) {
			// SHA1 the signature
			String sha1 = getSHA1(signature.toByteArray());
			// check is matches hardcoded value
			return APP_SIGNATURE.equals(sha1);
		}

		return false;
	}

  //computed the sha1 hash of the signature
  public static String getSHA1(byte[] sig) {
  		MessageDigest digest = MessageDigest.getInstance("SHA1");
			digest.update(sig);
			byte[] hashtext = digest.digest();
			return bytesToHex(hashtext);
	}

  //util method to convert byte array to hex string
  public static String bytesToHex(byte[] bytes) {
  	final char[] hexArray = { '0', '1', '2', '3', '4', '5', '6', '7', '8',
				'9', 'A', 'B', 'C', 'D', 'E', 'F' };
		char[] hexChars = new char[bytes.length * 2];
		int v;
		for (int j = 0; j < bytes.length; j++) {
			v = bytes[j] & 0xFF;
			hexChars[j * 2] = hexArray[v >>> 4];
			hexChars[j * 2 + 1] = hexArray[v & 0x0F];
		}
		return new String(hexChars);
	}


}